
Halloween is a perfect opportunity for photographers to experiment. There are so many creative effects to explore!
I want to share five techniques I used over the weekend. These ideas range from the simple, where you don’t need a fancy camera, to the more advanced, where you’ll need a degree of skill with Adobe Lightroom and Photoshop. Hopefully, there’s something for everyone.
1. Presets (filters)
Adobe Lightroom calls them presets, but you are probably more familiar with apps that use filters on your phone. They do the same thing.
Presets in Lightroom allow you to edit your images with a single click. Editing images can be incredibly time-consuming. Of course, if you want something done well, I’d always advocate putting the time in to do it right, but sometimes exploring presets can be a real productivity gain and save you a lot of time.
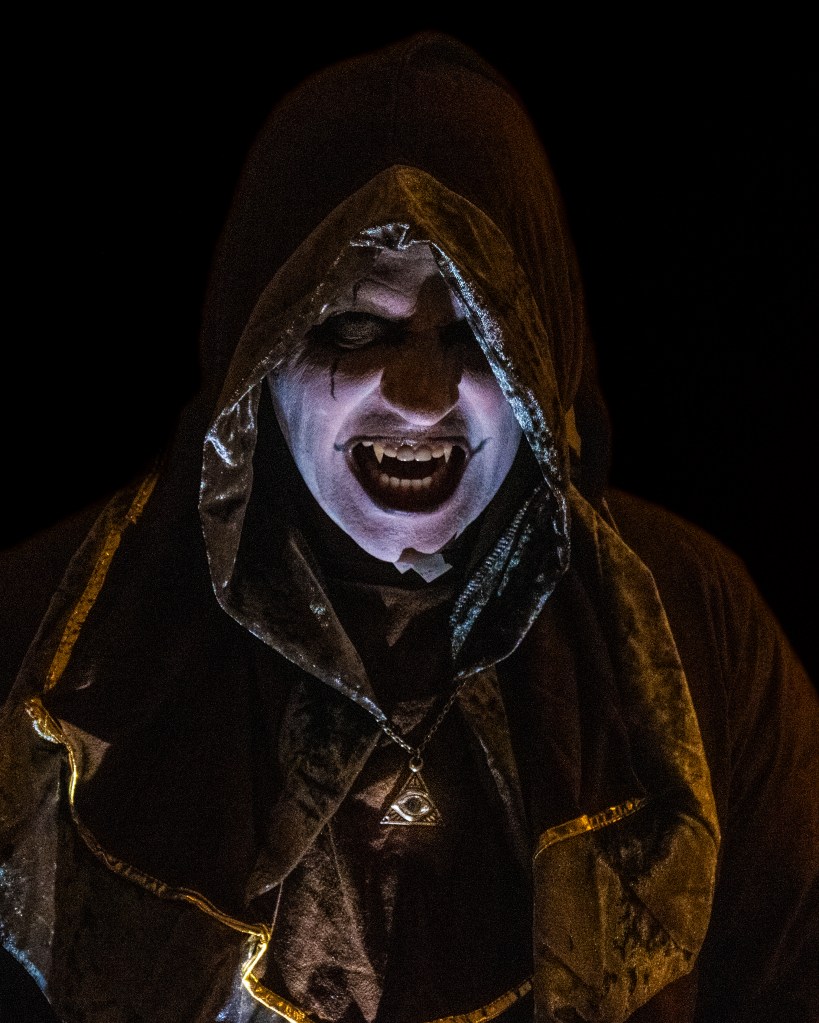
Black and white presets work well for spooky images. However, anything that allows you to manipulate the light to create a dingy, dark atmosphere or a creepy split lighting effect.

For the image above, I used the Snapseed app for iPhone. It’s definitely one to check out if you don’t have access to Adobe Lightroom or Photoshop.
2. Fangs
Plastic fangs are a pain in the neck (sorry, I couldn’t resist that one). They’re uncomfortable to wear and look tacky. I’ve even tried those ones that you stick to your teeth.
They fall out …
Creating fangs in Photoshop is very easy to do. Simply create a new layer in Photoshop. This is important because it allows you to work non-destructively. Should you make a mistake, you can delete the layer and start again without damaging your original image. You might want to rename the new layer “Fangs” or something similar and make it the active layer. Then use the pen tool to draw the fangs, one at a time. Zoom in to the mouth section of the face to do this. Then use the Clone Stamp tool to colour in the gnashers.
YouTube has plenty of tutorials guiding you through this process in Photoshop.
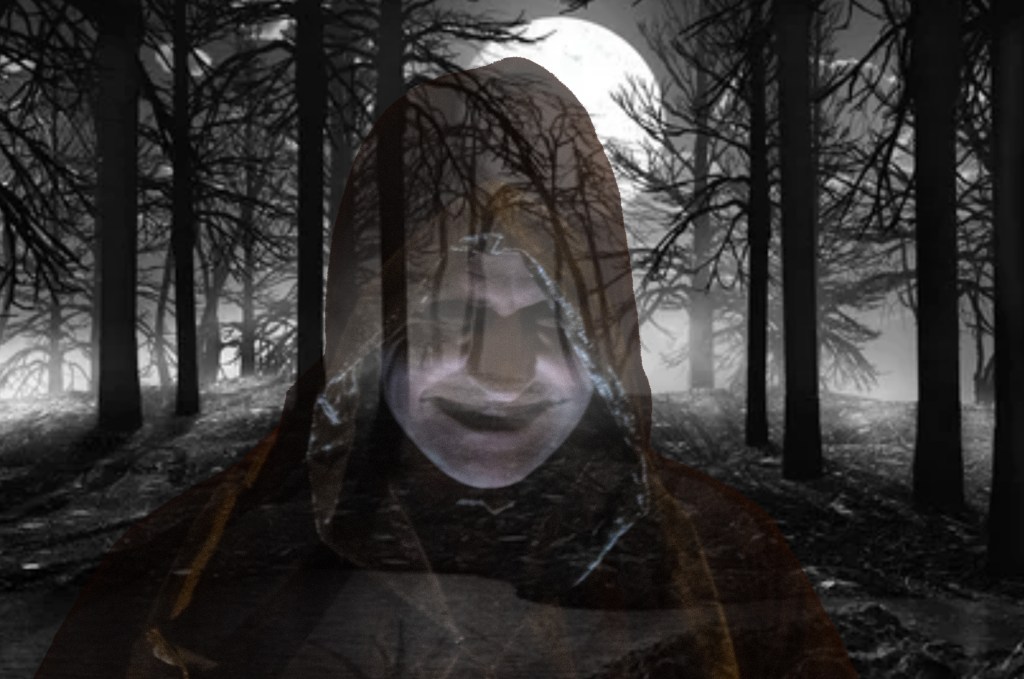
3. Ghosts (transparency)
This effect uses a double exposure (essentially a blend of two photographs). The Snapseed app I mentioned earlier can do this, but there’s a little more nuance to changing the transparency using software like Photoshop.
For a backdrop, you want a spooky landscape—dark woods, graveyard, ruined castle (you know the tropes). Then you overlay the backdrop with a subject, but dial down the transparency to about fifty percent. Your backdrop will determine how much dialing you will need to do. You want the subject to be visible, but not too much.
Gulp. Did I just see a ghost…?
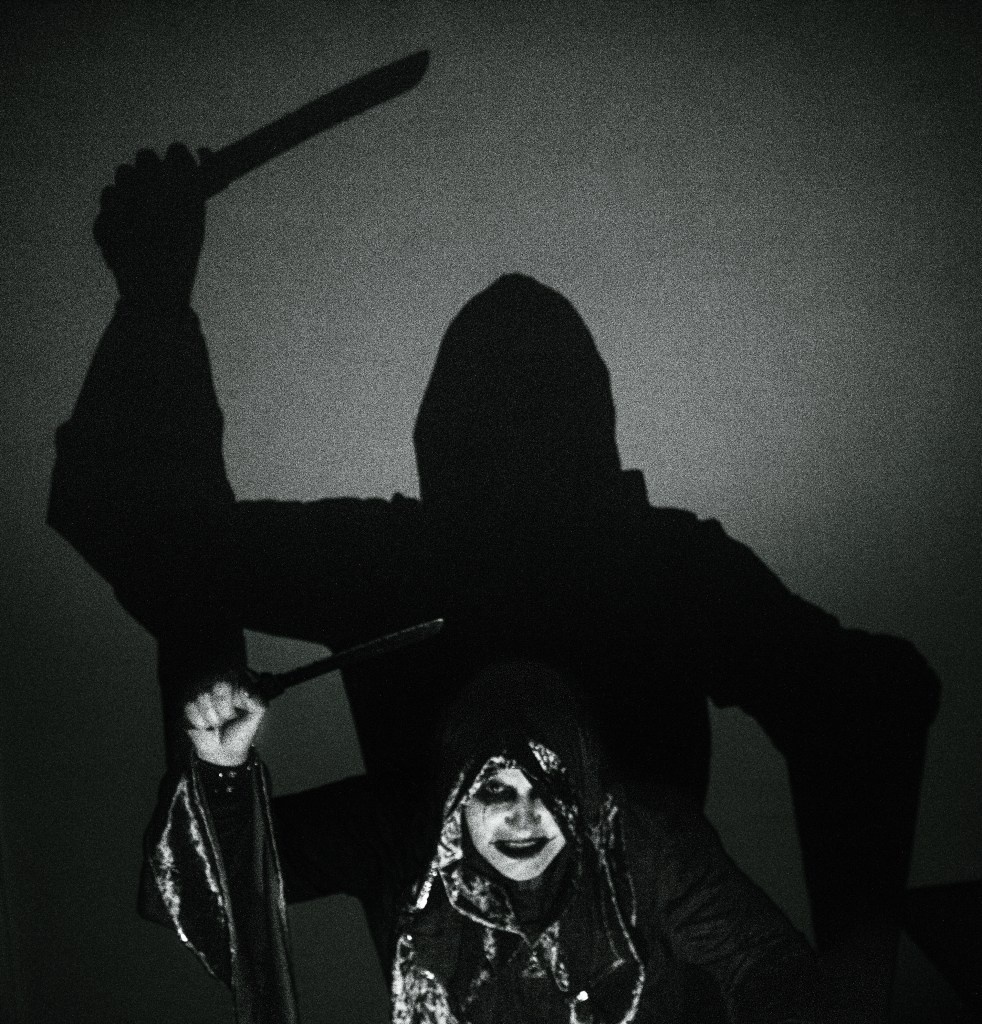
4. Shadow Play
Shadows are an awesome way to add drama and atmosphere to your images. Who doesn’t remember that iconic scene where Max Schreck’s silhouette as Count Orlok in F.W. Murnau’s 1922 classic Nosferatu creeps up the stairs?
You don’t necessarily need a fancy speedlite to create a good lighting effect, either. All you need is a good wall (preferably blank) behind you to cast a shadow on and a torch. For the shot below, I used the torch on my smartphone.
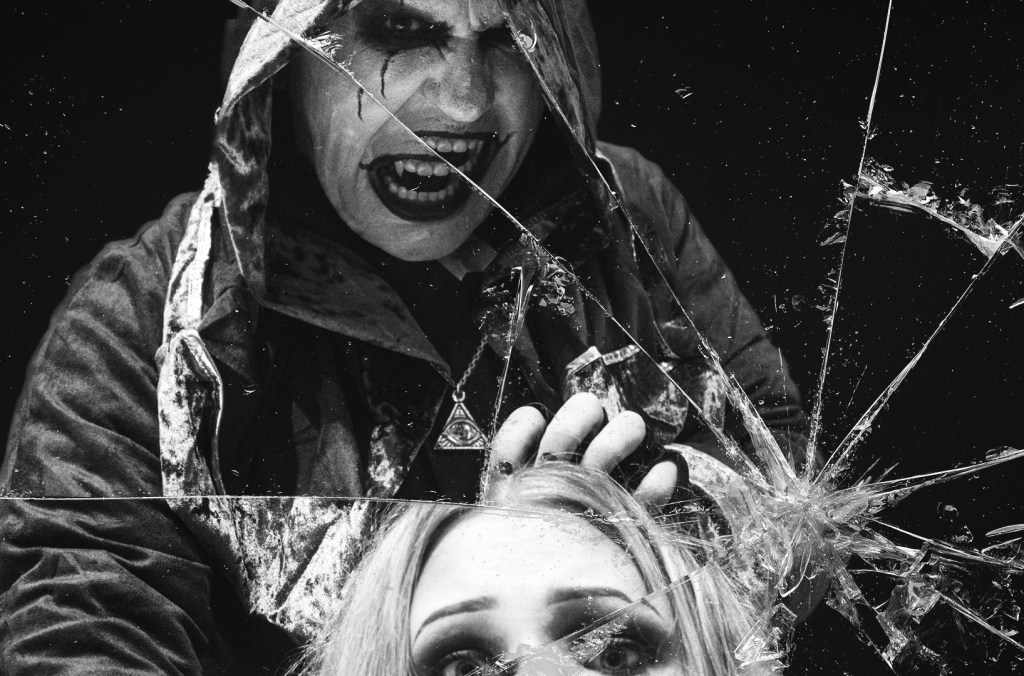
5. Shattered Dreams
Hat tip to Marty from Blue Lightning TV Photoshop for providing the idea and template for this one. My thanks to Cody too for serving as a willing victim. My favourite from the set, but also the most time-consuming to produce.
Usually, lopping a subject’s limbs off in a photograph is a big no-no. It’s jarring to see. We’ve all seen them. Photographs where a hand is inextricably cropped off, or even worse, part of the head.
Unless, of course, jarring and unsettling is precisely the look you are going for. That jarring effect is even more accentuated when you look at the scene through the shards of a broken mirror. I won’t lie, this one required a fair amount of editing in Photoshop, but I love the end result.
I hope you like the images and that they have given you some ideas to get started. Let me know your ideas in the comments below.
Happy Halloween 🎃👻💀

Pingback: Photo of the day (“Shattered Mirror”) | Scott's Unfinished Pictures